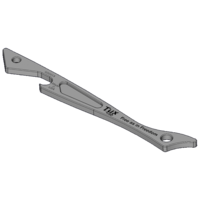
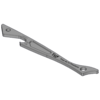
A small project that was designed and manufactured using the open source method. The bottle opener will be machined from 316ss and 304ss flat stocks.
 Bottle Opener
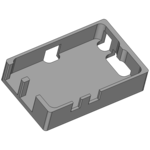 TuxCASE for Raspberry Pi
- Updates -
May 22 2012
Initial Production Summary

TThe initial batch of the bottle opener has been completed and mailed out. After numerous revisions, only . . . show details
The initial batch of the bottle opener has been completed and mailed out. After numerous revisions, only 12 pieces of blanks were left for the final revision. Therefore, out of 100 blanks only 12 acceptable bottle openers were produced.
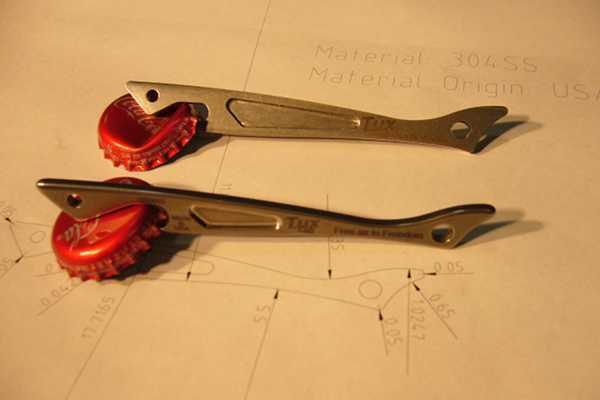
There first couple revisions had too shallow of a mouth opening that caused the bottle opener to peel the edges ofthe bottle cap. Subsequent revisions were made to lengthen as well as deepen the mouth opening to give better mechanical leverage. Electrochemical etching was inconsistent and was replaced with direct laser marking.
Apr 26 2012
Bottle Opener Revision 5
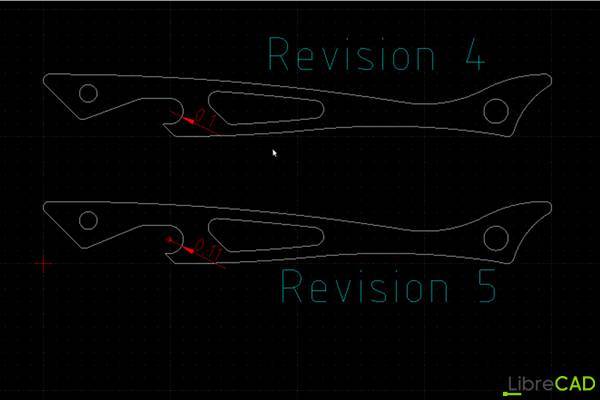
The mouth opening was increased from a radius to .100" to .110" to better accommodate taller caps.
Apr 25 2012
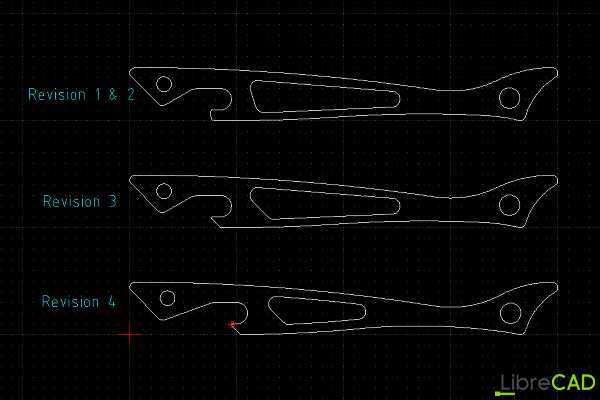
Bottle Opener Revision 4
The shallow mouth opening has too steep of an angle and tends to . . . show details
The shallow mouth opening has too steep of an angle and tends to peal the cap back. The mouth opening was elongated to give better leverage to lift the cap.
Apr 24 2012
Initial Production Batch
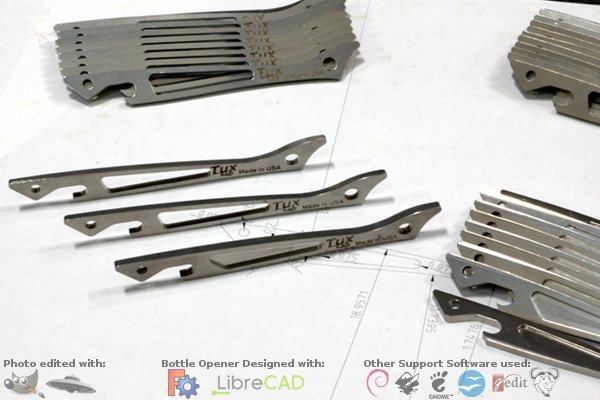
Turing the initial prodcution machining, the machining speed and feed parameters used during prototyping was . . . show details
During the initial prodcution machining, the machining speed and feed parameters used during prototyping was slowly increased. Gradually, the machine time per bottle opener was reduced from18 minutes to 15 minutes. The vibratory deburing took another 4 hours and tumble burnishing takes around 2 hours. The logo engraving process takes another 5 minutes.

Apr 23 2012
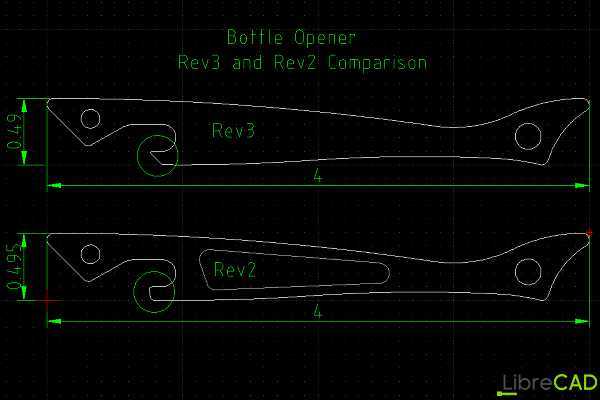
Bottle Opener Revision3
The mouth lip was modified for better clearance and the center cavity was removed to help . . . show details
The mouth lip was modified for better clearance and the center cavity was removed to help speed up the machining process and the logo were modified to reflect the coarser resolution of electrochemical etching. The height was also reduce to better fit the raw stock height.
Apr 21 2012
ElectroChemical Logo Etching
![]()
An electrochemical etcher was used to explore using etching the Tux-Lab logo on to the Stainless Steel bottle opener. . . . show details
An electrochemical etcher was used to explore using etching the Tux-Lab logo on to the Stainless Steel bottle opener.
| Electro-Chemical Etcher - McMaster | |
| Starter Kit 2amp Hand Marker | $73.80 |
| 16oz Stainless Steel Electrolyte | $10.77 |
Apr 19 2012
Post machining deburring and polishing

Tumbling with the ceramic media on the left . . . show details
Tumbling with the ceramic media on the left will deburr and slightly round the sharp edges. Burnishing with the porcelain media on the right will brighten the surface dulled by the deburring process.
Apr 13 2012
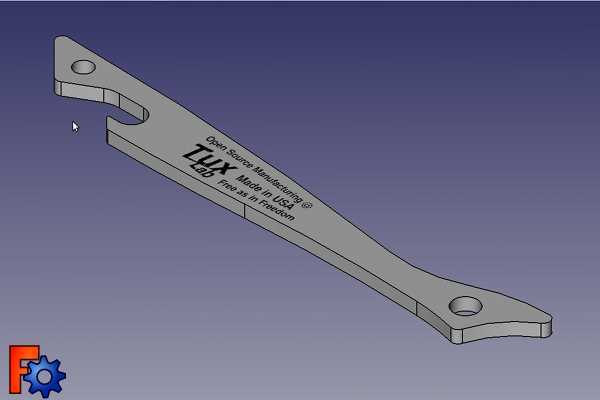
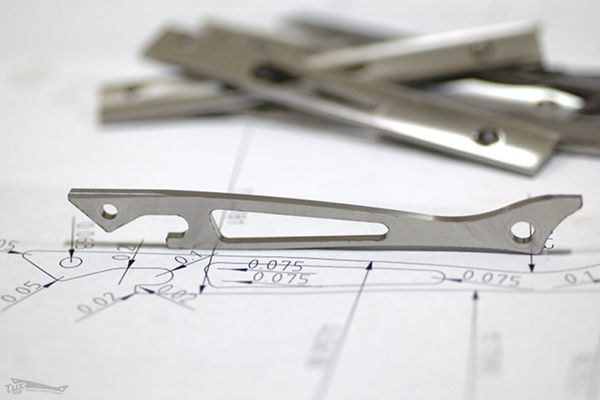
Prototype Machining
| Stock - Metal Express | |
| 304ss flats, 4” x 0.5” x .125”, 100pc @ ~1.865 | $86.00 |
| Tooling - Martitool | |
| .125 Double End 4F Carbide End Mill TiAlN, 2 @ 8.51 | $17.02 |
| .250 Double End 4F Carbide End Mill TiAlN, 1 @ 14.82 | $14.82 |
| 45 deg Shell Mill Insert, ACK300 grade, 5 @ 10.70 | $53.50 |
| Fixture – HomeDepot | |
| 6-32 Hex Socket Screw | $0.65 |
| 10-24 Hex Socket Screw | $0.86 |
| 6-32 Irwin Drill/Tap Kit | $4.97 |
| 10-24 Irwin Drill/Tap Kit | $5.47 |
| Tooling – Martitool, 2nd Batch | |
| .125 Double End 4F Carbide End Mill TiAlN, 4 @ 8.51 | $34.02 |
| .250 Double End 4F Carbide End Mill TiAlN, 2 @ 14.82 | $29.63 |
| .125 4F Carbide Drill Mill 120Deg 1 @ 8.44 | $8.44 |
| 3.3mm .1299” Cobalt 130deb Screw Length Drill TiAlN 2 @ 7.58 | $15.16 |
| USPS Priority Mail | $12.45 |
Apr 07 2012
Fixture Machining
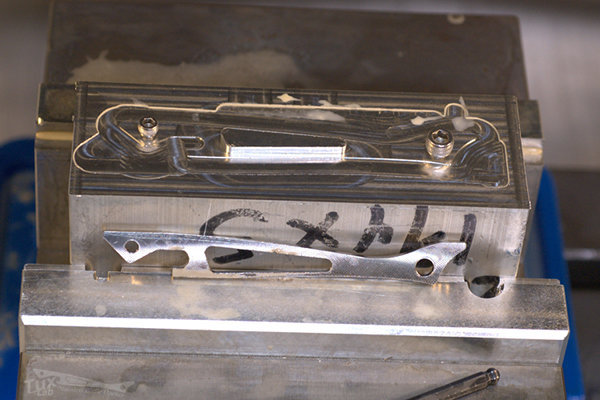
Fixture made from 6061 Aluminum.
Apr 05 2012
Machining Tool Path Planning
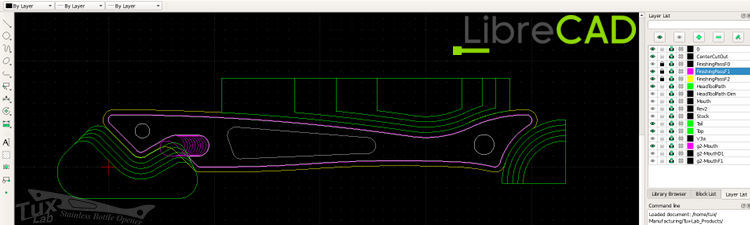
Before the g-code can be written, the transition points for the . . . show details
Before the g-code can be written, the transition points for the machining tool path needs to be determined. In g-code, the tool path is represented by a series of linear and circular moves. Each transition point, ie where straight line meets a curve or where curves of different radius meets, needs to be specified in terms of its X-axis and Y-axis coordinate.